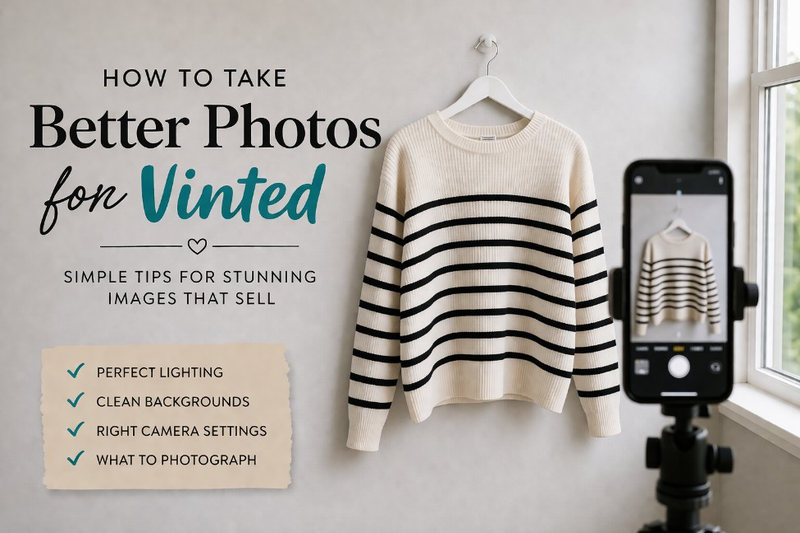
It’s lovely when I hear from people who read my blog, and a few of you have got in touch after reading my Vinted posts and asked for advice on taking better pictures of items. So I thought I would write a quick guide on taking photos for Vinted, aimed at regular people who just want better images, not semi-professional sellers.
This isn’t a post about how to professionally fold all the different types of item. I’m not going to be teaching you how to nip jumpers in around the arm or to fold your jeans like they do it in retail.
I am talking about your setup. I mean things like where to take the photographs, how to light them, what type of background to use, how to optimise the settings on your camera, etc.
All of my tips are very easy to master, and once you have planned it all out once, it takes no time at all to set it up again the next time.
Here goes then – this is how to take the best photos for selling on Vinted, so your images look amazing and attract buyers.
Your Setup
If you get your setup right, it will do most of the work for you. Plus, you will already have better images than 75% of other Vinted sellers.
First, you need a good background. You don’t need to stress about it, just find somewhere neutral, flat, and clean. Carpets with bits of sock fluff visible are not acceptable! In fact, some people suggest the algorithm won’t push items it thinks are pictured on the floor.
Anything reflective is a bad idea too (glass tables, mirrors, etc).
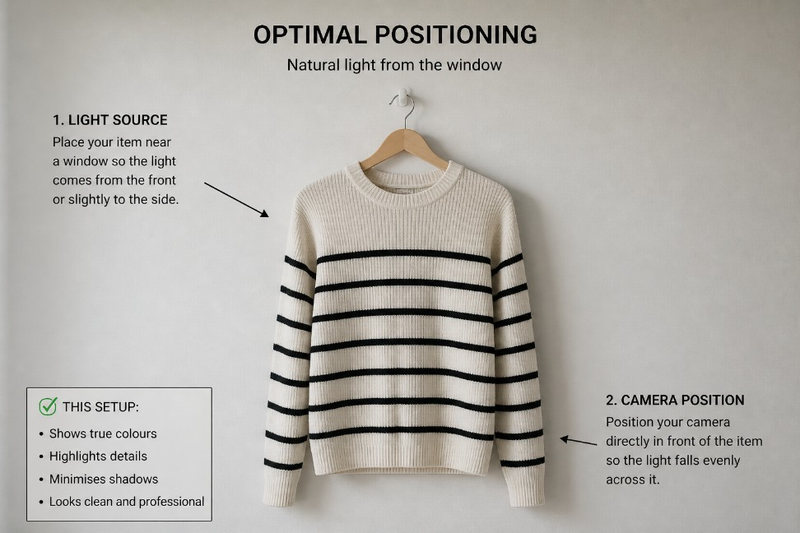
I have a grey wall with a picture on it, so I remove the picture and use the picture hook to hang my clothes on. Grey is a good background colour actually because it allows the true colour of the item to shine through. Other people lay them flat on a nice neutral rug, it just depends what your options are at home. Some people buy backgrounds but it’s really not necessary unless you are a reseller or a professional.
Ideally, this will also be near a window, to help with the lighting.
Lighting
Bad lighting can make even the loveliest of items look terrible, but luckily, it’s an easy thing to fix. You don’t need to go buying box lights (unless you want to!), but a tiny bit of knowledge will help here.
A combination of natural light and good positioning is your friend, and potentially some artificial light to help things along if necessary.
Find a big window when it’s nice and bright outside, and use the soft light from that window to light your item. Ideally, it will shine directly onto the item or slightly to the side of it to highlight all the details. If you have to use artificial light, if it’s a dull day for example, try to have the light coming at a 45 degree angle to the item and slightly from above if possible. This will spread the light across the item rather than blasting straight onto it, which can create nasty shadows.
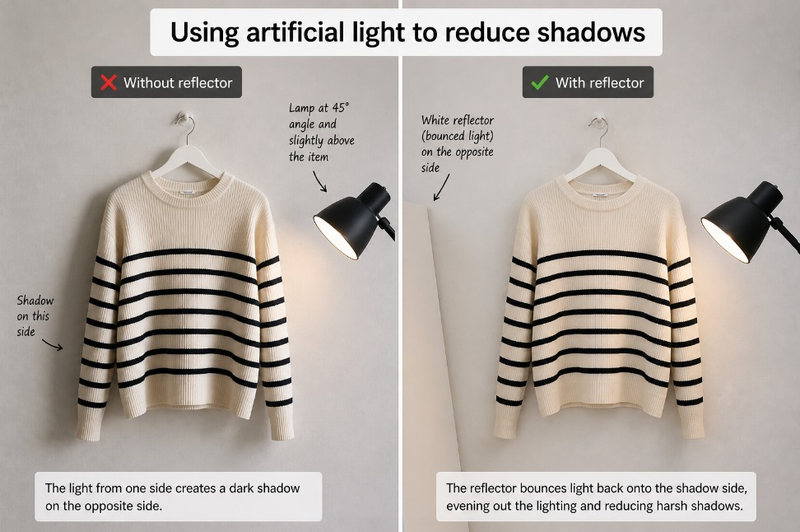
If shadows are an issue, you need a second light coming from the other direction to balance things out. If you don’t have one, find something white out of shot on the shadowy side, so the light hits it and reflects back, eliminating the shadow.
The main thing to avoid is backlighting. It is a pet peeve of mine because it looks horrible 🤢
This is when the main light source is coming from behind the item. It basically silhouettes the item and strips out any detail, dulls the colours, and makes me want to scream 😂
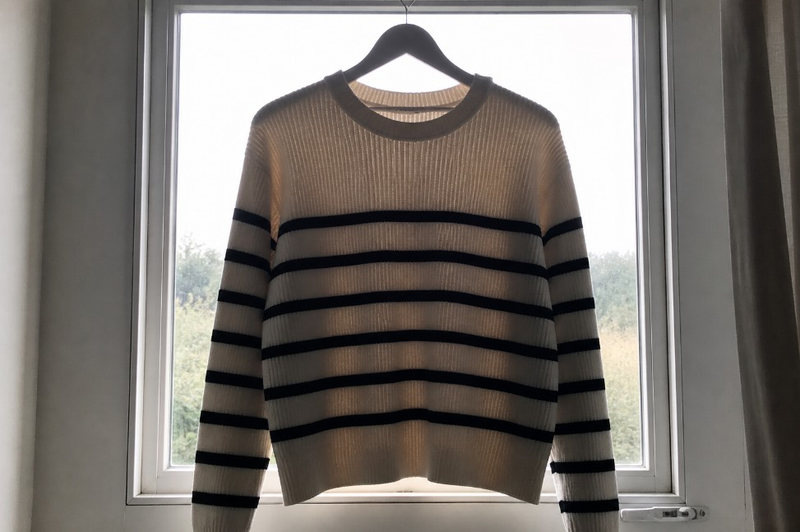
The typical example is when someone takes a picture of their item with a window behind it. Please stop doing this guys!
Top tip: Got a sticky up label that won’t stay flat? Most labels have been stitched to leave a loop, so they open up. Stick a coin in there and the weight will hold the label flat while you take the photograph!
Your Camera Settings
This is one easy trick that very few other sellers take advantage of.
Phone cameras are brilliant these days, and with a few taps, you can turn them into clothes selling machines.
The one thing you must do when taking photos for platforms like Vinted, is to change the aspect ratio to 1:1 (square). This way, whichever photo you choose for your main image will be the right format for the platform. It won’t get cut off or anything and will look great.
I would also recommend having grid mode activated so you can make sure your image is straight and centred.
Most phones do a good job of focussing on the subject of the image anyway, but I always lock it with a double tap just to make sure it’s sharp.
Oh, and this should go without saying, but no filters, and no flash. Ever.
What to Take Photos Of
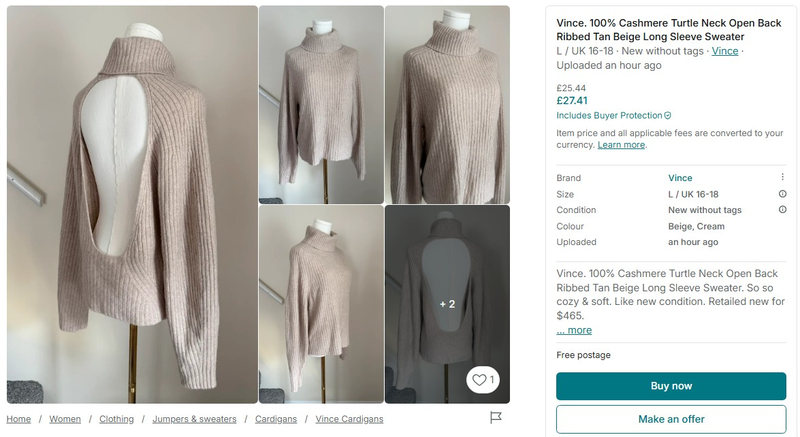
More photos means more chance of selling your item. It’s a fact. So once you have got your home studio set up, don’t be a lazy Lucy by only including one or two snaps. You need at least five.
Ideally you need images of:
- Front
- Back
- Alternative angles if they add anything
- Brand label (close shot)
- Size label (close shot, often included with the brand label)
- Washing instructions label (close shot)
- Close shot of any minor defects
This not only makes you more trustworthy, but it reduces the chances of annoying questions from buyers, and also the chances of your item being returned for being ‘not as described’.
Five or more photos taken using the tips described here, and your items will be attracting tons of interest in no time 😊